Google Business Profile bulk management with Synup
Efficiently manage multiple Google Business Profiles in bulk with Synup's powerful tools. Streamline your online presence today!
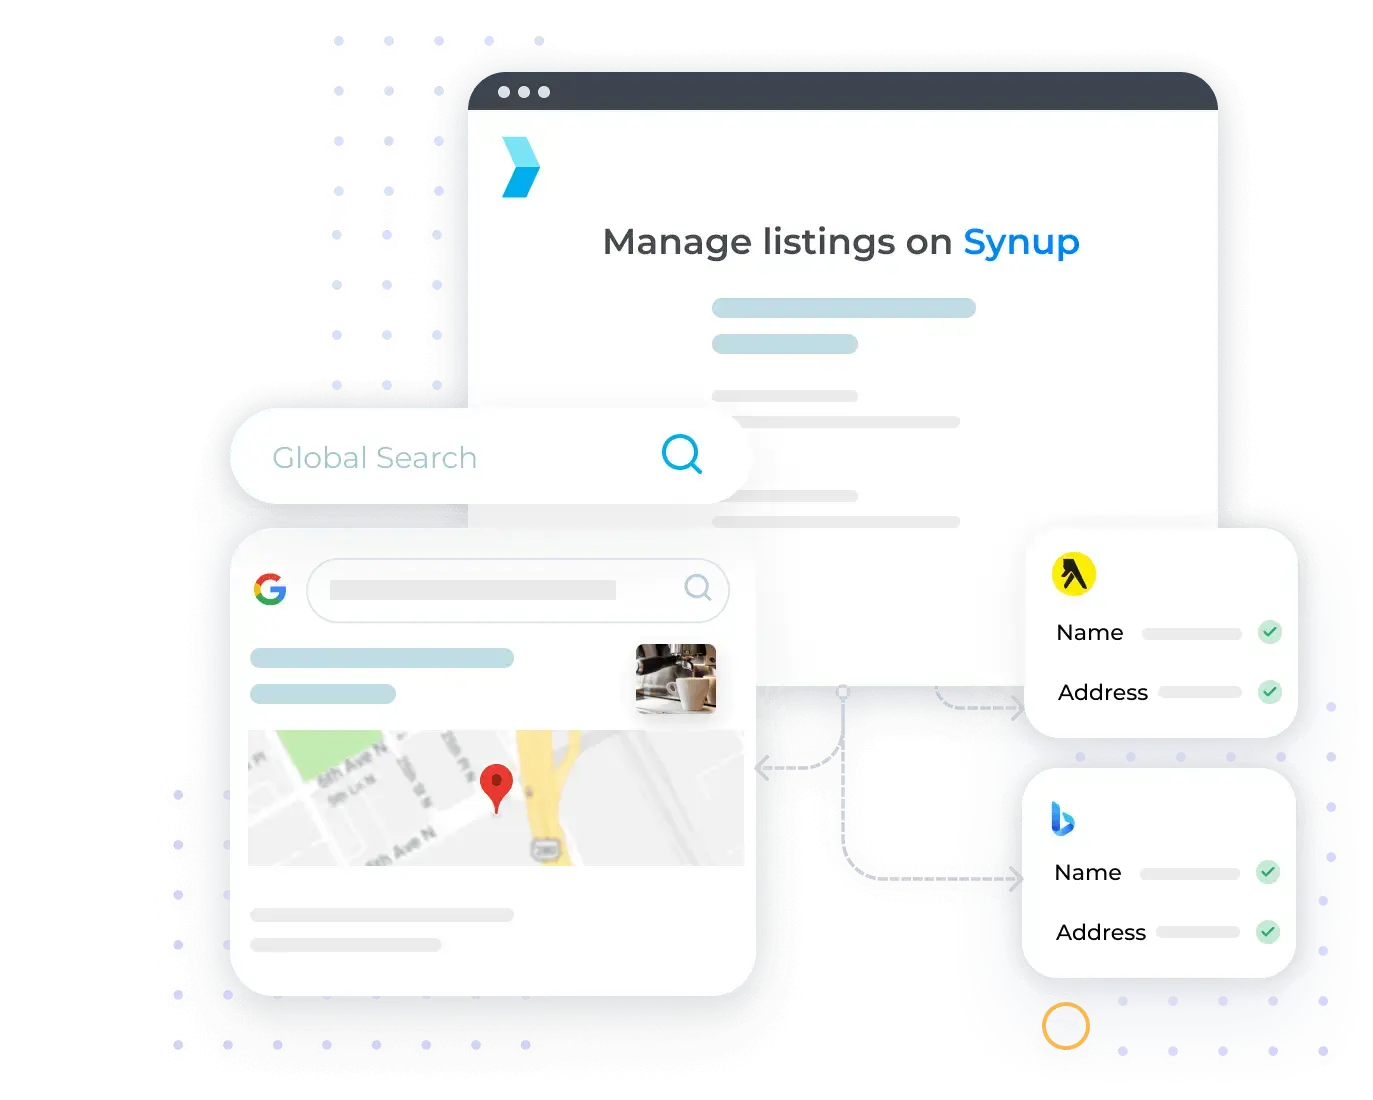
Imagine being able to update all your locations from a single, user-friendly interface. No more jumping between tabs or spending hours on repetitive tasks. With Synup, you're in control of your entire digital presence, all from one central command center.
How can bulk management help?
Synup’s Google business profile bulk management capabilities can help you in many ways
Efficiency
Bulk management dramatically reduces the time required to update multiple listings. Instead of updating each location individually, you can make changes across all locations simultaneously, significantly streamlining your workflow.
Consistency
Maintaining a consistent brand message across numerous locations can be challenging. Bulk management ensures uniformity in your business information, marketing messages, and branding across all locations, reinforcing your company's identity.
Error Reduction
The likelihood of errors increases when manually updating multiple listings. Bulk management minimizes this risk by allowing you to make changes once and apply them universally, ensuring accuracy across all locations.
Bulk-manage your Google Business Profile with Synup
Once your Synup dashboard is set up, first connect your Google business account with Synup in just a few clicks. Then follow these simple steps to manage all your Google business locations in bulk.
Bulk-editing Google Business Profiles
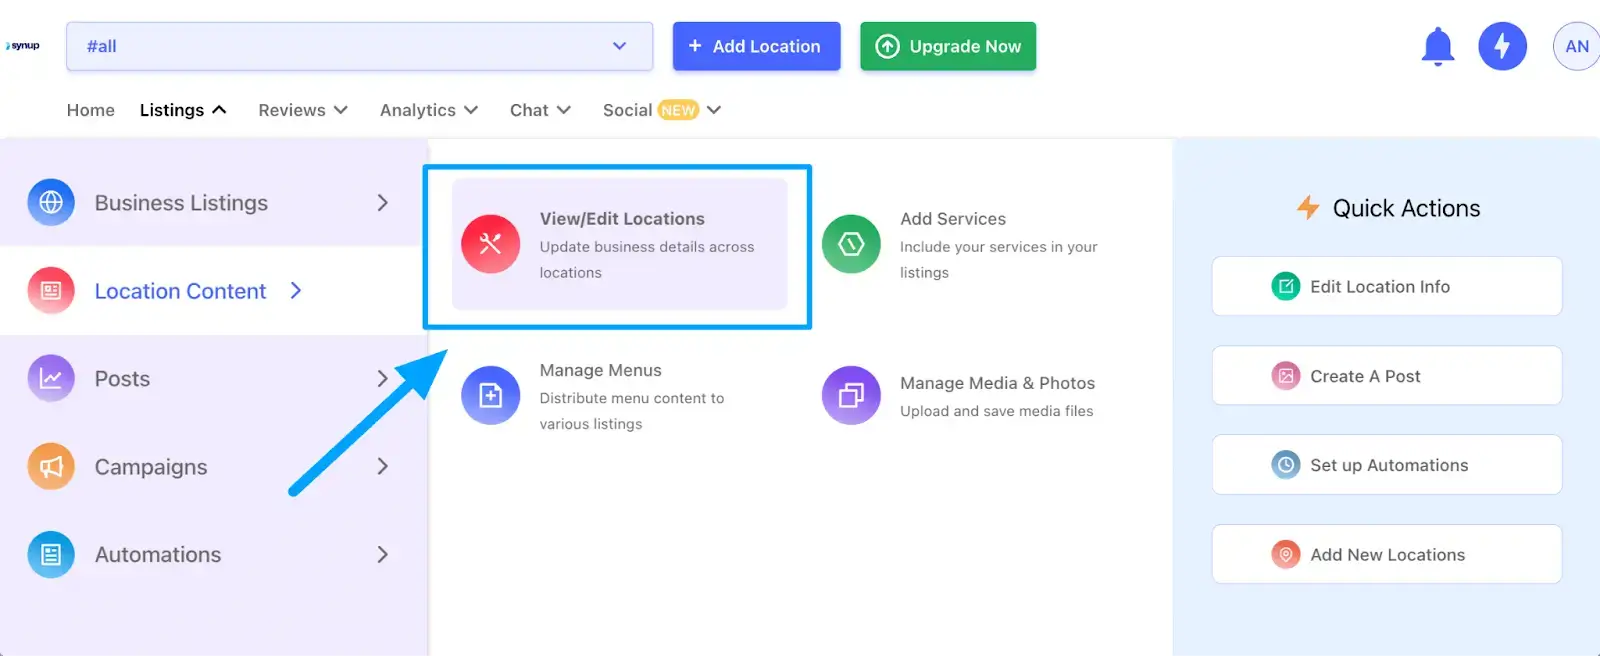
Step 1: Go to the top navigation menu and click “Listings” > “Location Content” > “View/Edit Locations”.
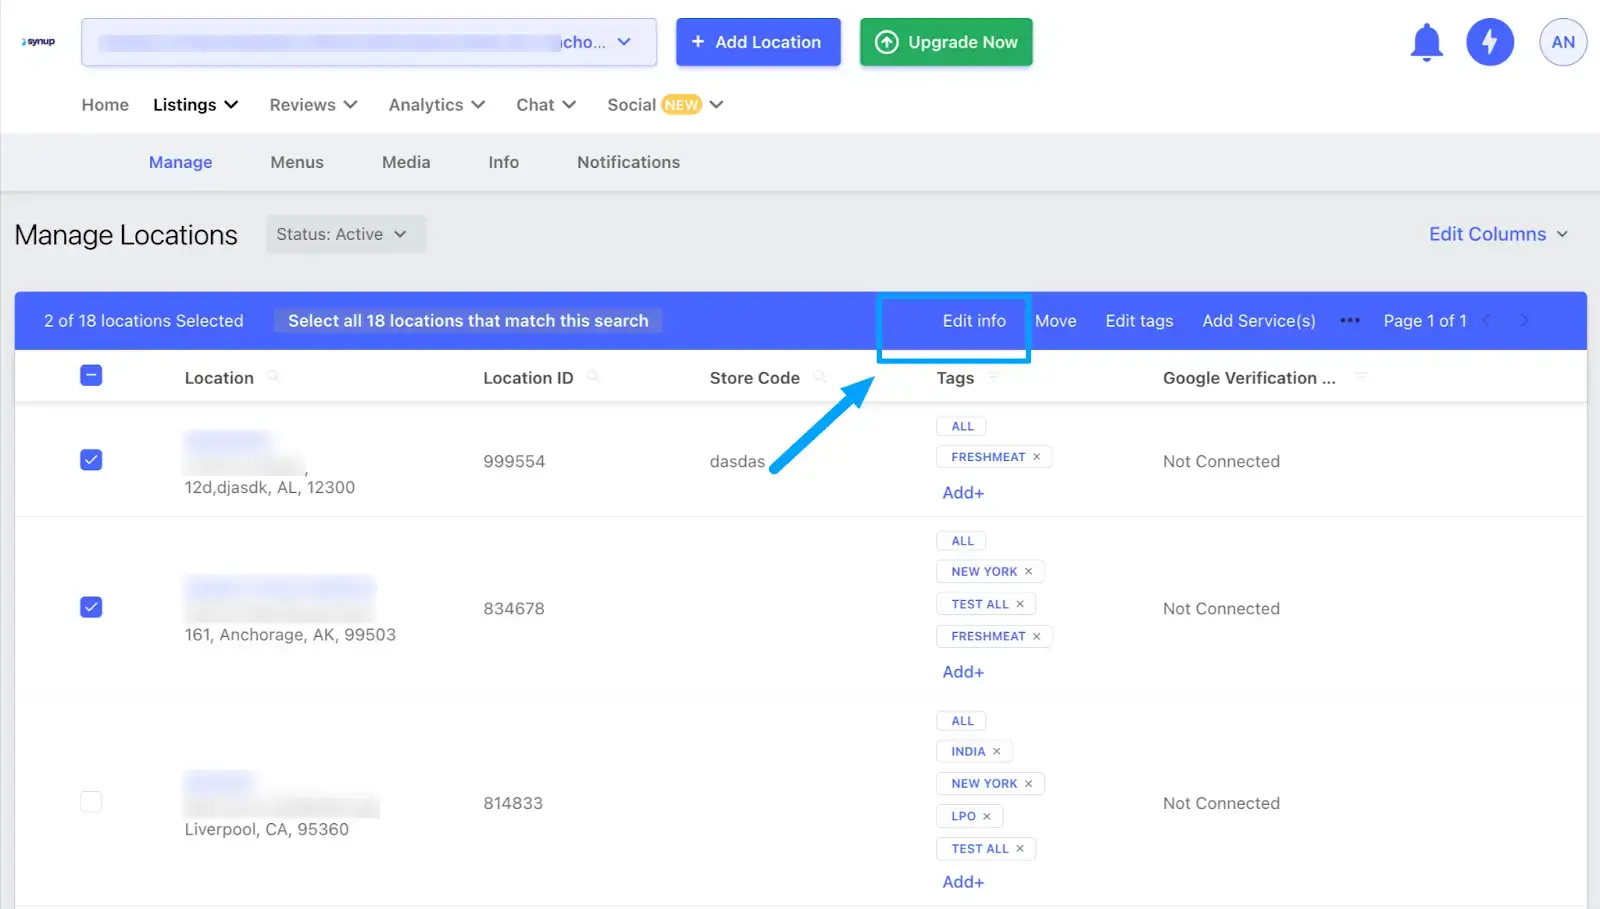
Step 2: On the overview screen, you’ll see all locations where your Google business Profile is active. Select one or more locations to edit them to together. Click ‘Edit Info’.
Step 4: Select the required fields you want to edit and click ‘next’. Pick Google as a publisher. Next, edit and save the new info. The new changes will reflect on all the locations selected.
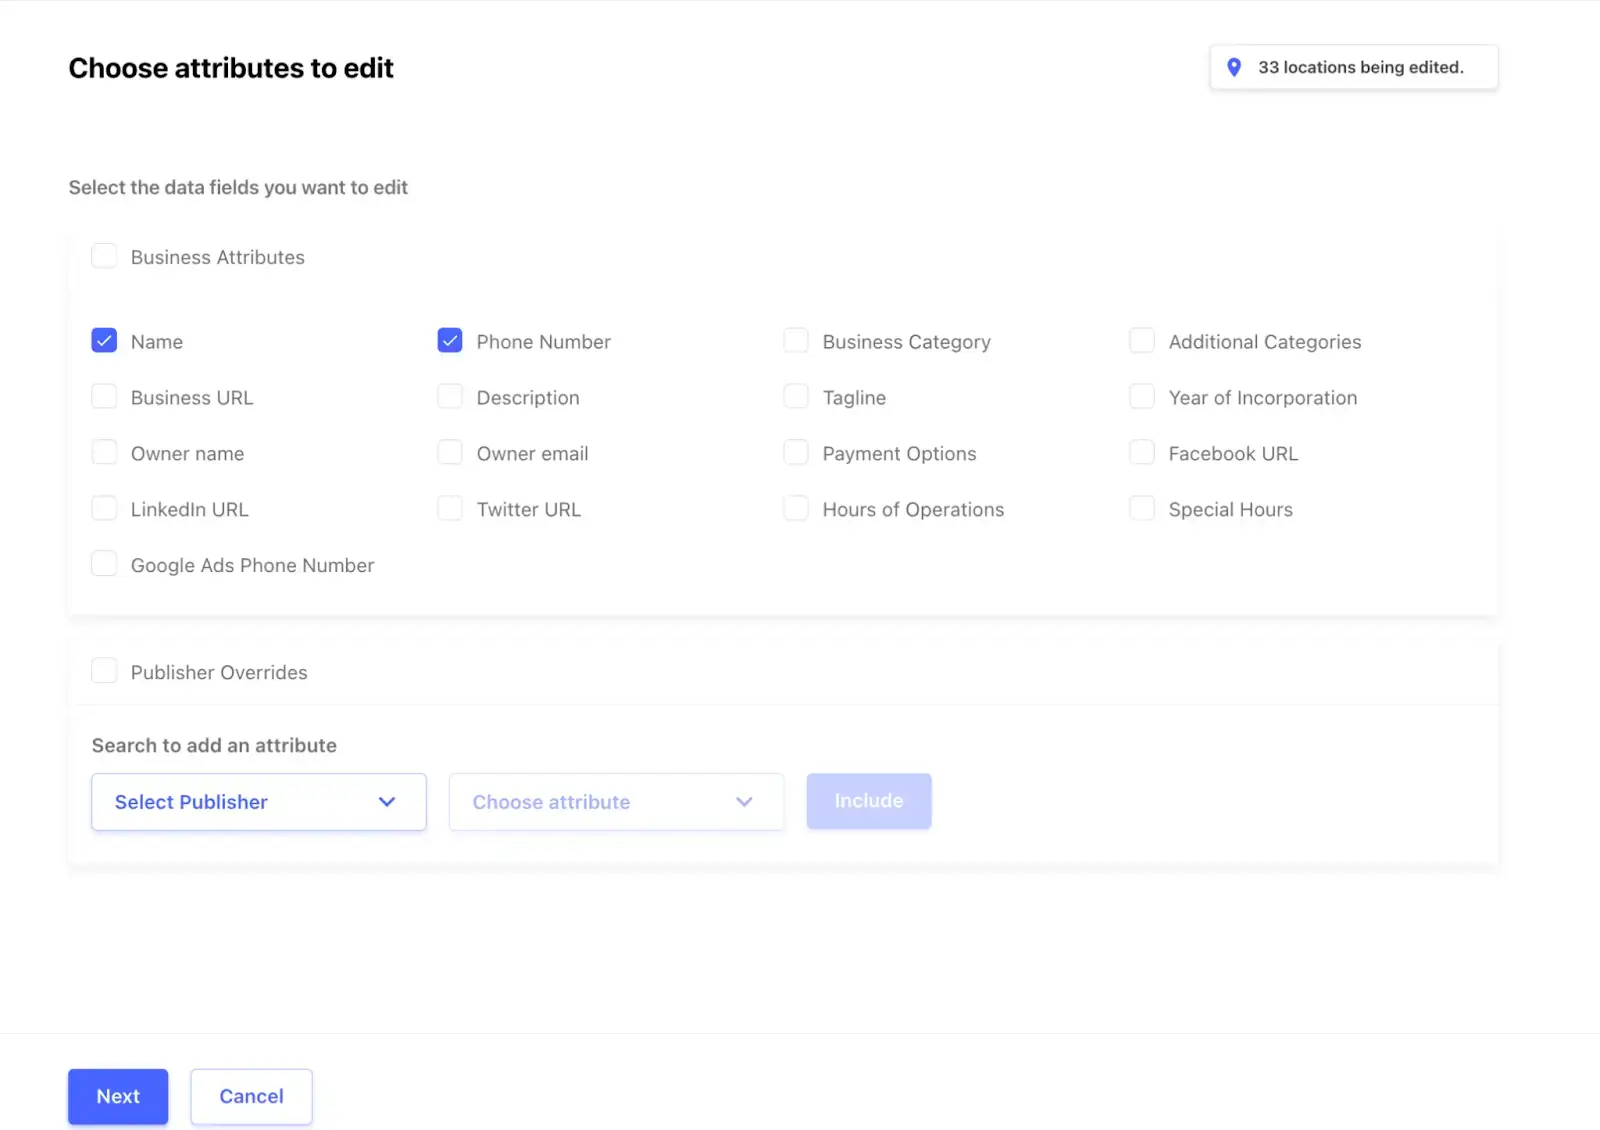
Bulk-add Services
Step 1: Go to the top navigation menu and click “Listings” > “Location Content” > “View/Edit Locations”
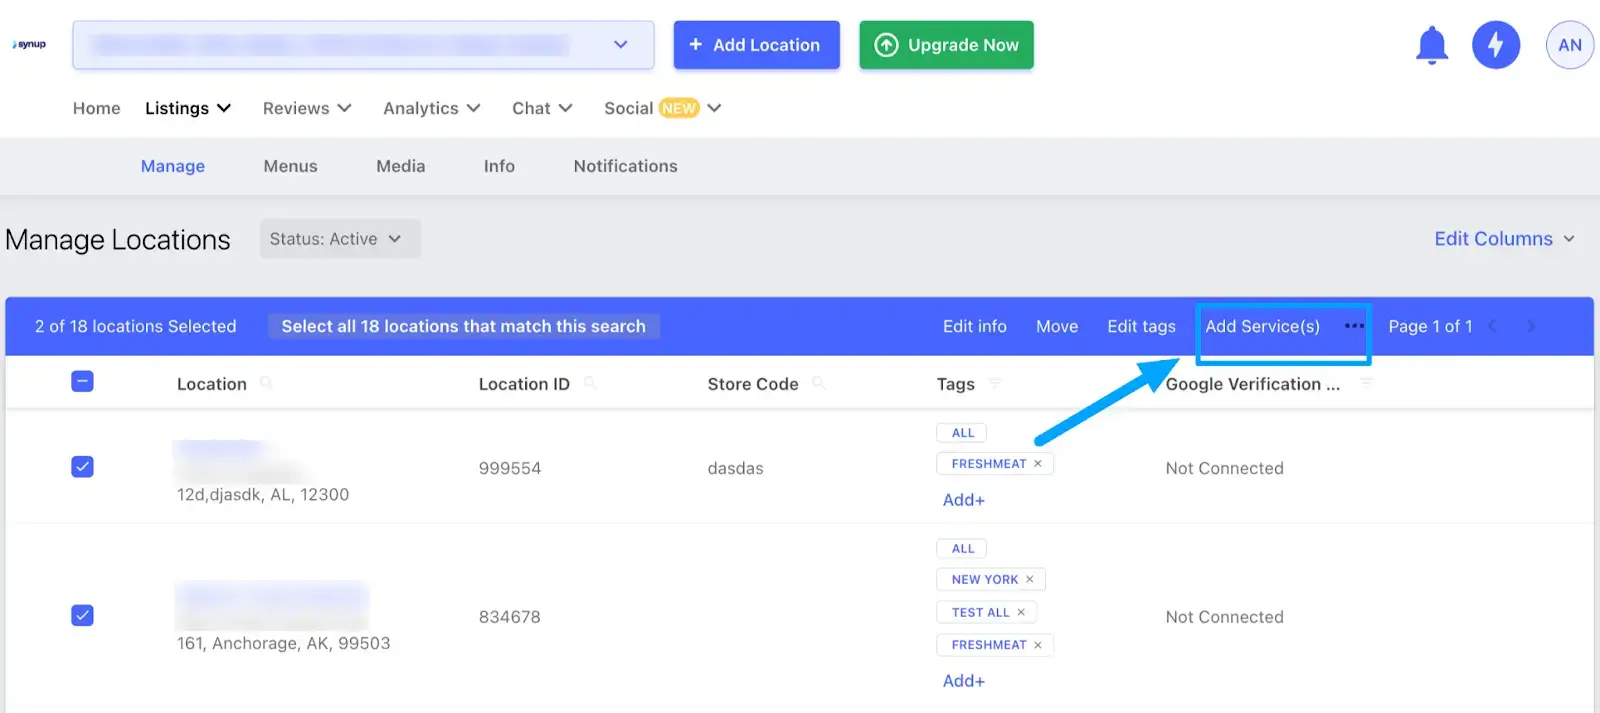
Step 2: After selecting multiple locations, click ‘Add Services’
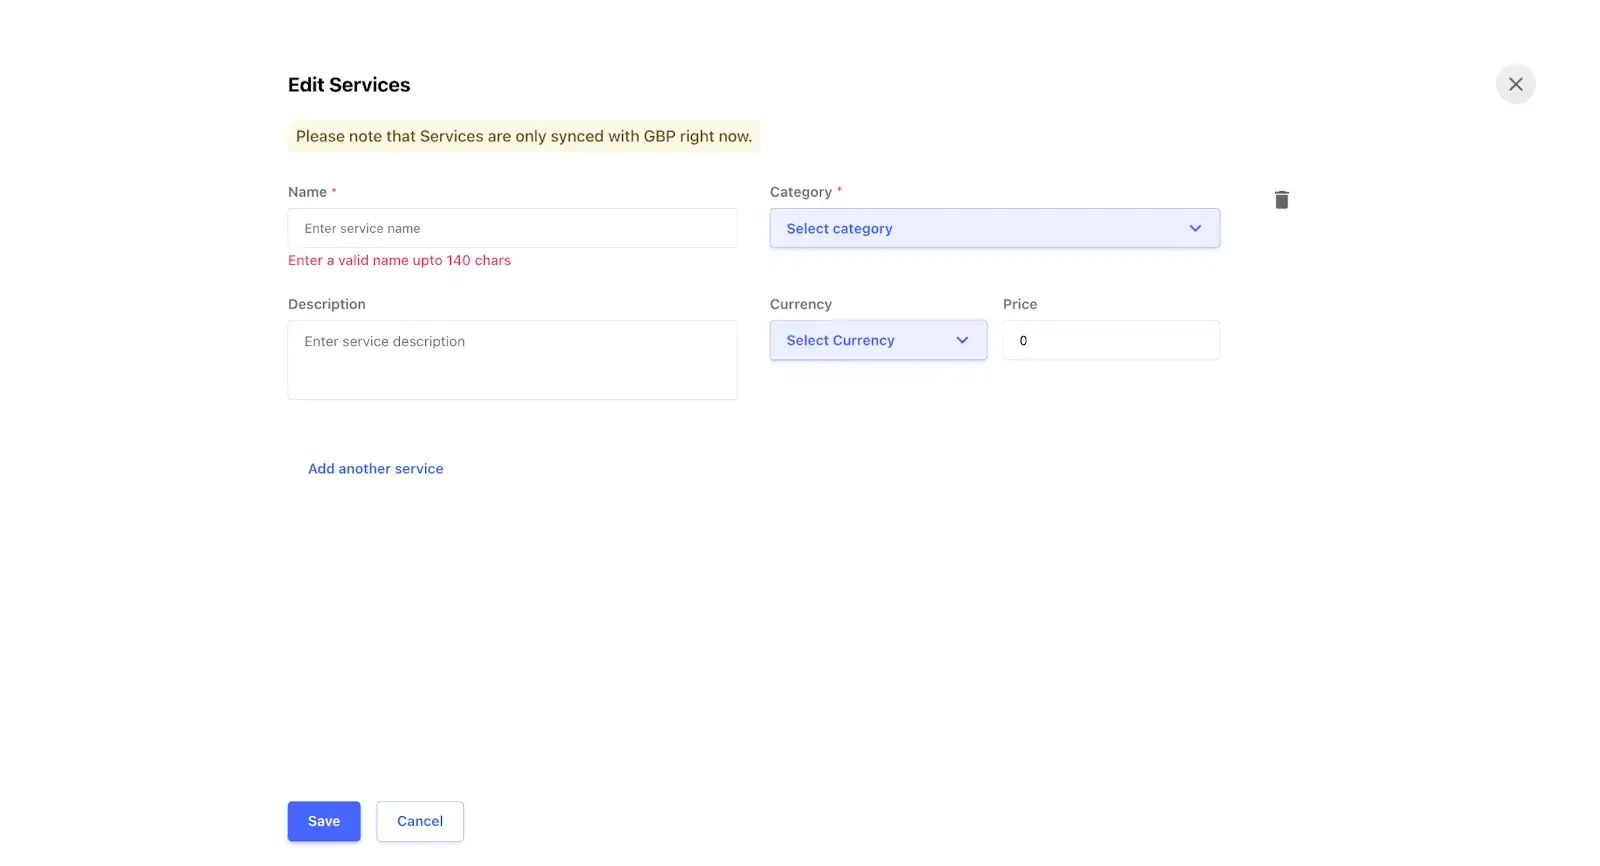
Step 3: Edit service categories and other details. You can choose to add more than one services. You’ll only see categories relevant to the locations selected. Once done, save the services.
Bulk-add Menus
Step 1: Go to the top navigation menu and click “Listings” > “Location Content” > “Manage Menus”.
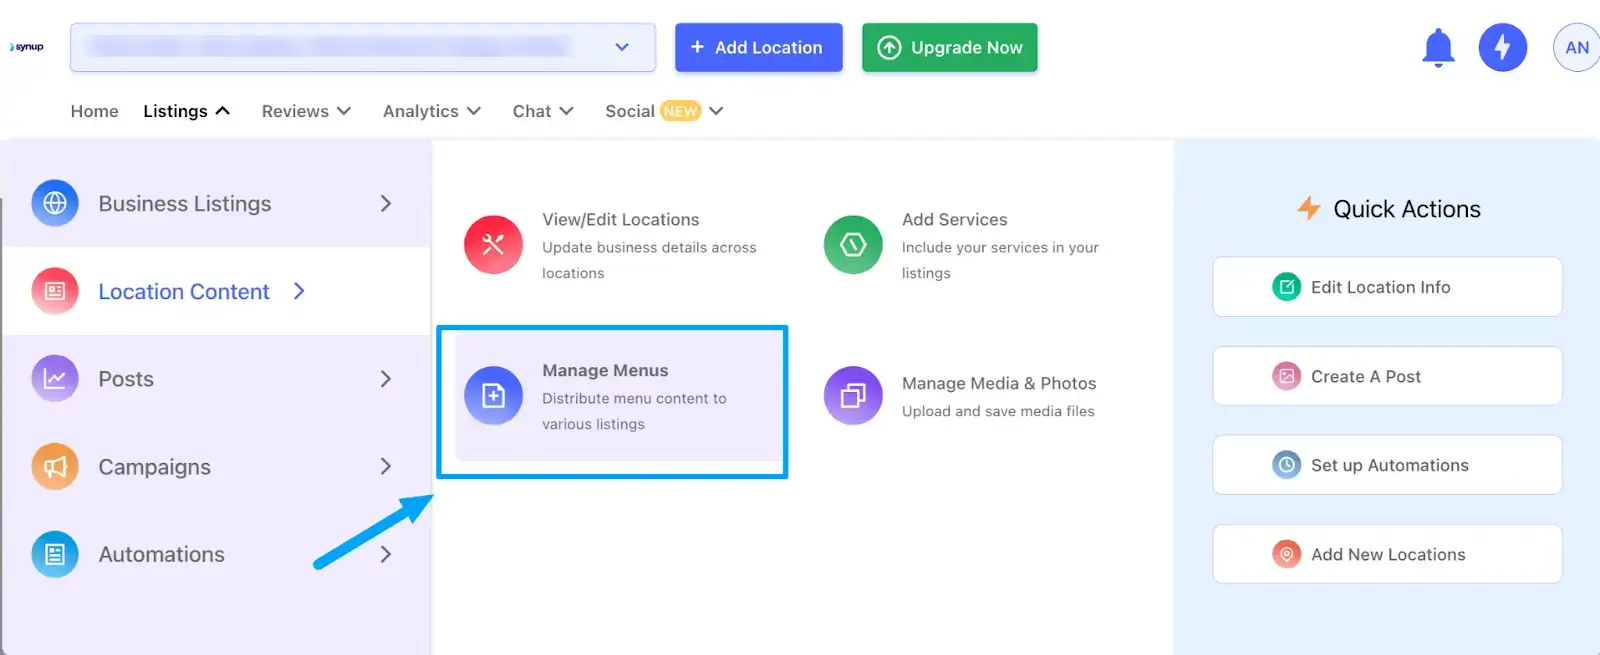
Step 2: Here you’ll see all the active menus for your locations. Click ‘Add Menu’.
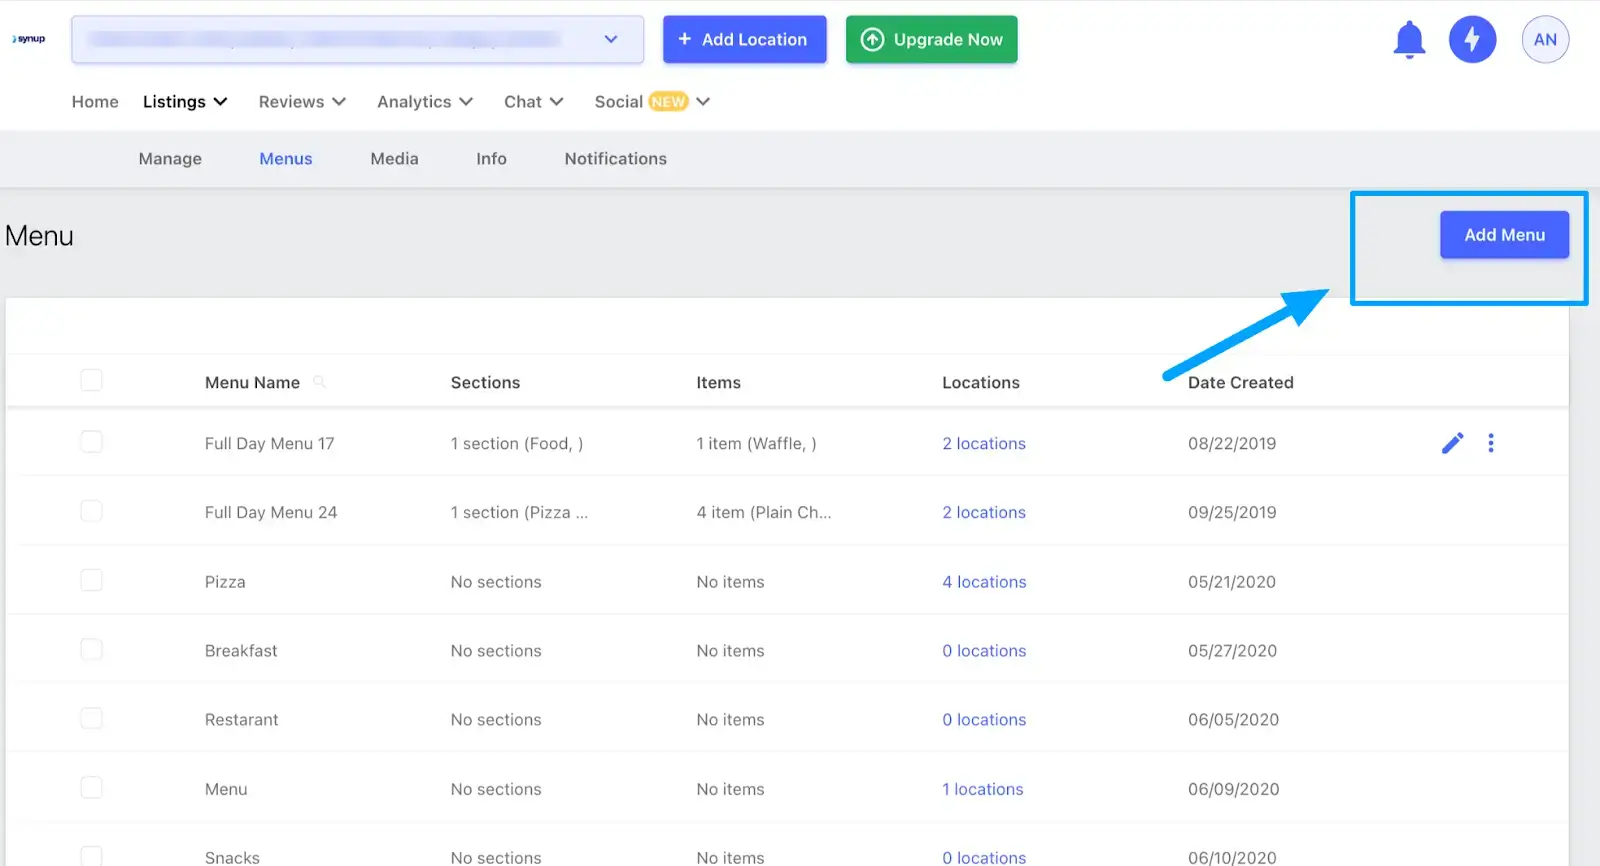
Step 3: You’ll be able to see the newly added menu in the list. Simply click the ‘edit’ icon next to it to start adding menu items.
Step 4: To assign the menu to multiple locations, click on the location tag on the menu. Next, add more locations using name, store code, address, or other parameters. Click ‘Apply and Save’


Bulk-add Media
Step 1: Go to the top navigation menu and click “Listings” > “Location Content” > “Manage Menus”.
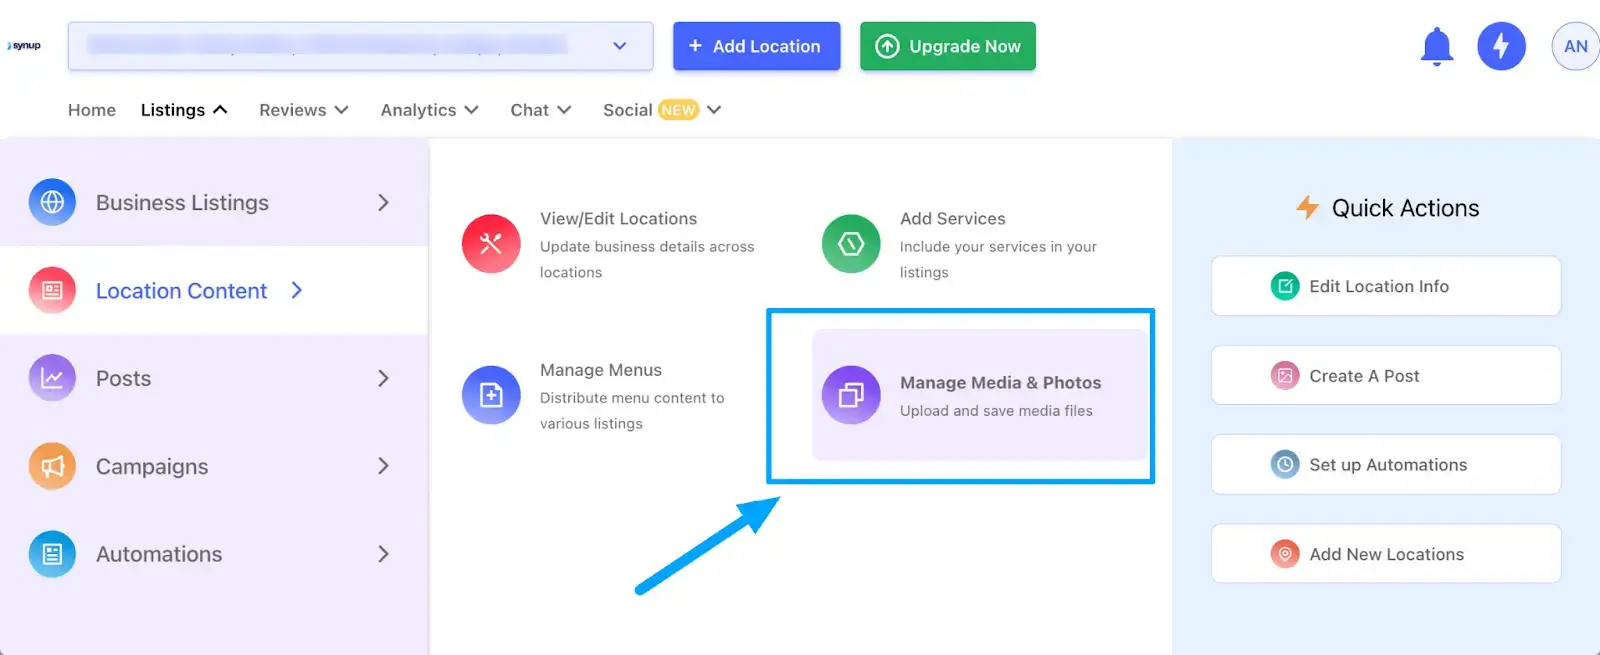
Step 2: You’ll see all the existing media on your profiles. Click the ‘Upload Media’ on top right. You can import files through desktop, links, Google drive, or your connected social channels.

Step 3: Once uploaded, you’ll be able to see the new media in the list. You can assign it to more than one locations. Click on the location tag for each file and apply it to more locations.

Manage multiple Google locations with ease
This was just the tip of the iceberg, with Synup you can do a lot more changes to your profile in bulk – such as posting content, running campaigns, updating hours, and more. We also have pre-built recipes to create these automations for you.
Ensure your Google Business Profile is up to date with accurate information. Cut the hassle of managing multiple location on your own.
New to Synup? Book a demo to see it all in action


