How to Change Page Roles in Meta Business Suite
Learn how to change page roles in Meta Business Suite. Follow a simple process to assign new roles to users and maintain platform security and organization. Get step-by-step instructions for changing page roles now.
It’s helpful to have multiple team members managing your Meta Business Suite. But not everyone needs admin access to your Page. As you grow and manage your page, you’ll get a better idea of the level of access your team members need. Here’s how to change Page roles in the Meta Business Suite.
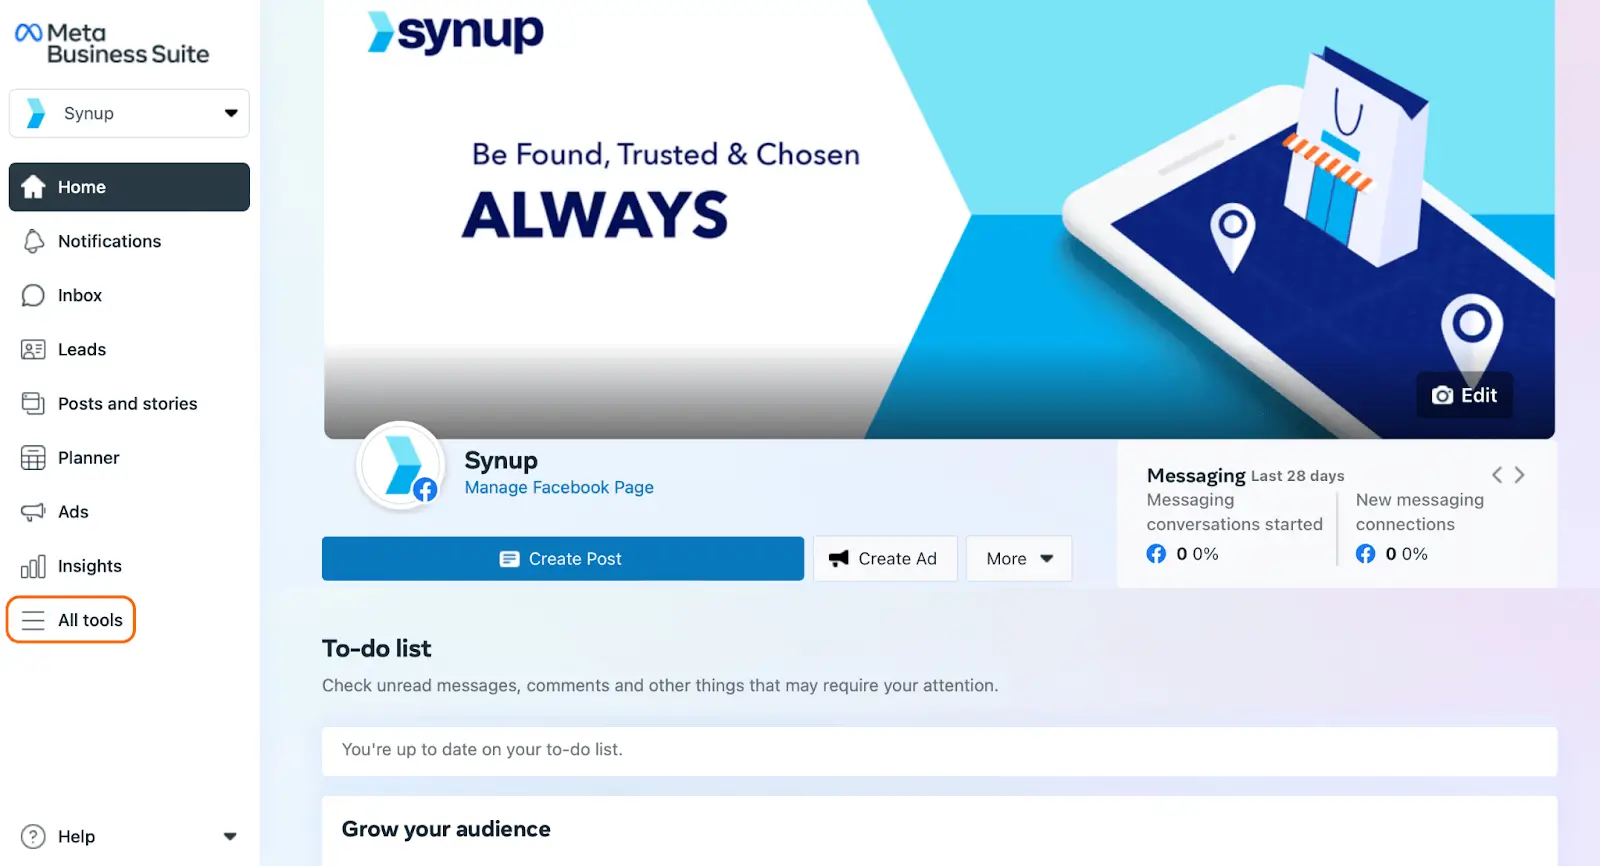
Step 1. Select “All tools” on the side bar.

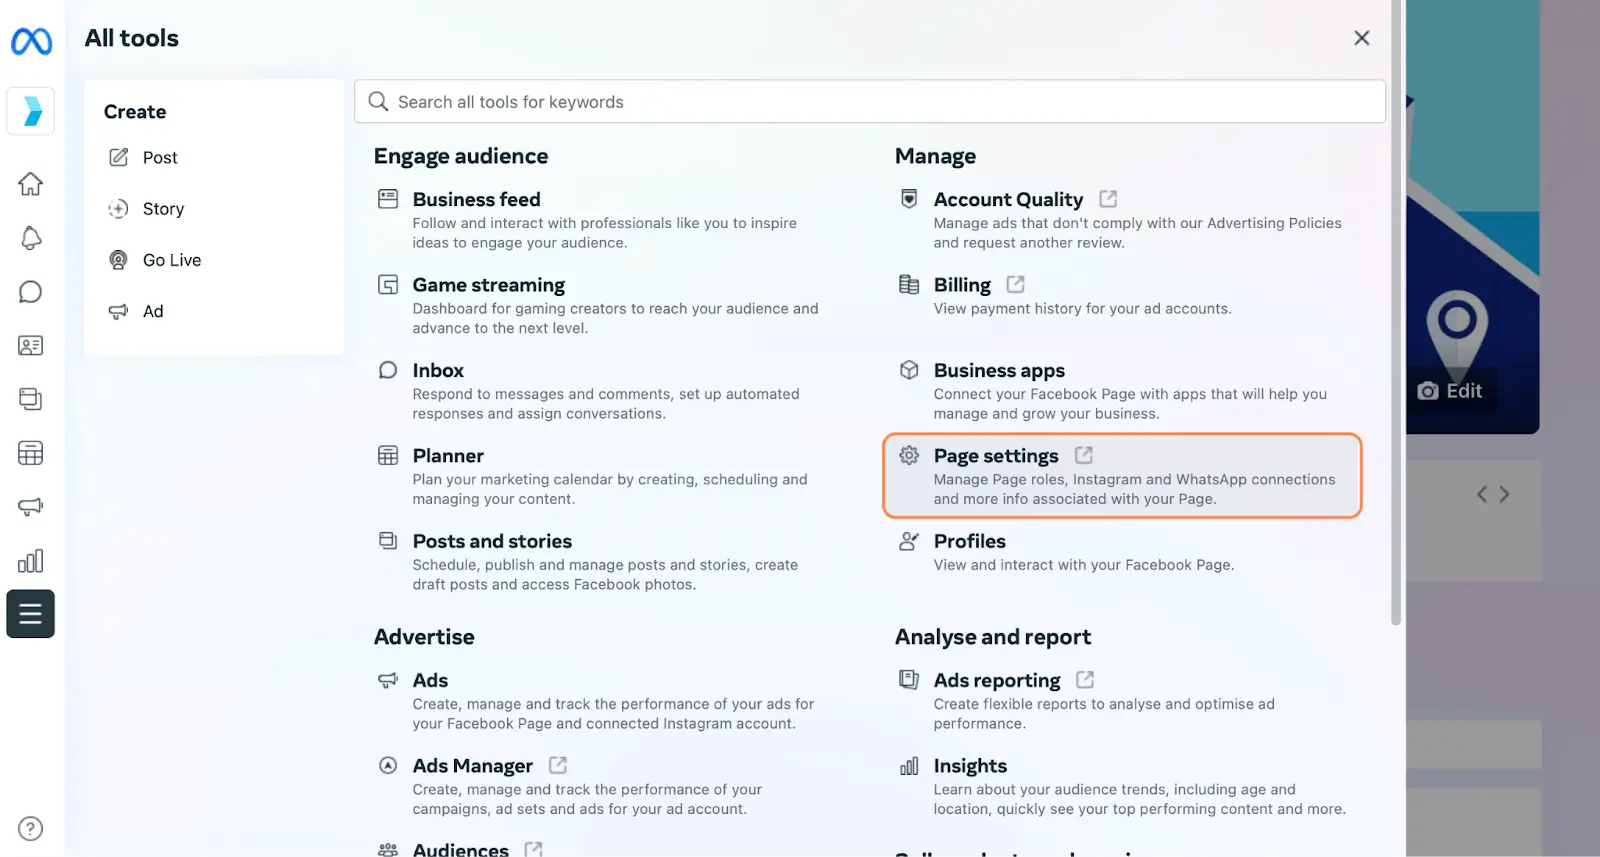
Step 2. Select “Page settings.” This is where you can manage Page roles, Instagram and Whatsapp connections, and more!

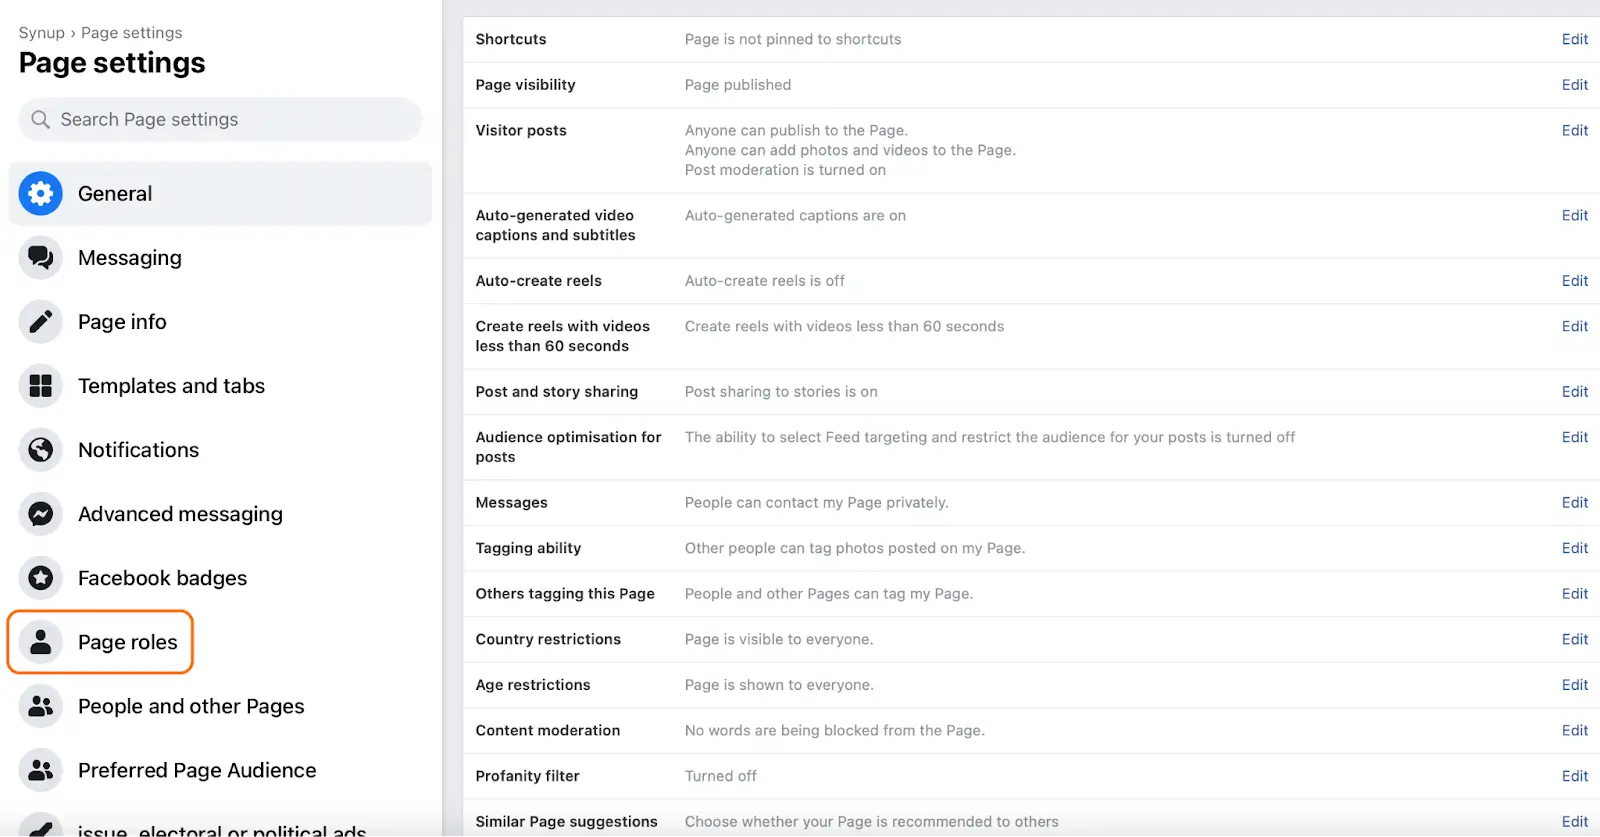
Step 3. Once you’ve navigated to “Page settings”, click on “Page roles”. This is where you can see who manages your Page at-a-glance, and assign new people to manage your page.

Step 4. On the “Page roles” tab, scroll down to “Existing Page roles”. Here, you can see who manages your page at-a-glance and manage their roles.

Step 5. Click “Edit” next to the person whose role you want to adjust. From here, you can select what role you want them to play on your business’ Facebook Page. You can make users admins, editors, moderators, advertisers or analysts.

An admin has complete control of the Page’s attributes and actions, including managing Page roles. An editor can do nearly everything that an admin can - except change Page roles. Moderators can manage comments, make posts, send messages, create ads, and more. Advertisers create ads and view post analytics, while analysts just have access to post data. If none of these seem to fit what you need for your business, you can even create a role with custom permissions!
Now, you’ve successfully changed the roles of your team in Meta Business Suite. And don’t worry - you can always go back and change them again if you remove someone’s permissions by mistake! Of course, you can also remove their access entirely if they leave your team.


