
Manage location menus
How do I create and maintain location menus?
Select a client, then open Clients → All locations → Menus and select Add Menu. Add the menu name, currency, sections and items, then save it. Use the menu’s actions to edit, clone, assign or delete it. Only restaurant or food-business locations under that client can be assigned, and assignment does not itself publish a Google menu.
Key facts
- Menus are stored in a client-scoped catalog, so select the correct client before creating one.
- Each menu needs a name and currency. It can contain a description, sections, items and item photos.
- Items can include a name, description, price, calories, allergens and ingredients.
- A menu can be assigned only to non-archived restaurant or food-business locations belonging to the same client.
- Menus-tab assignment associates the saved catalog menu with locations; it does not trigger Google publication.
Why this matters
A reusable menu keeps the same structure available for several restaurant branches without rebuilding every section and item from scratch. The assignment step makes branch scope explicit: the customer can confirm which locations should use the menu and remove a branch that should not. Checking the client, currency and location type first prevents a menu from being associated with an ineligible or unintended branch.
Steps
Open Clients → All locations, select the client, and choose the Menus tab. Review the existing rows before adding another menu; each row shows its section, item and assigned-location counts.
Select Add Menu. Enter a clear menu name, confirm the currency code, such as USD, and add an optional description.
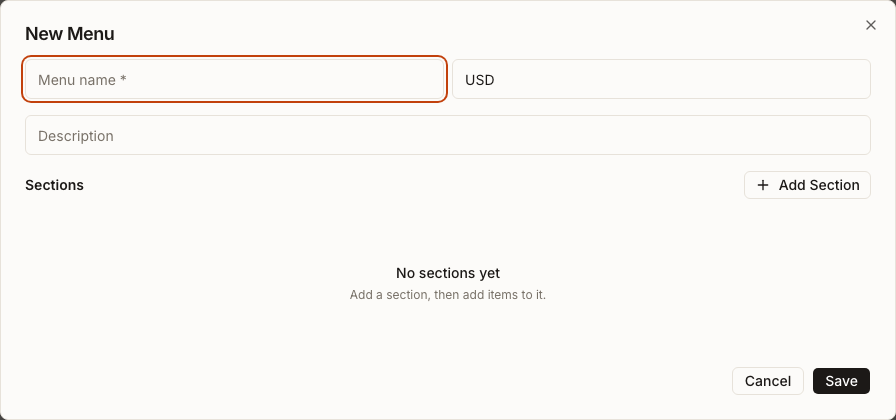
Select Add Section and enter the section name and optional description. Use sections to group items in the order customers expect, such as Entrées, Sides or Desserts.
Select Add Item inside the section. Enter the item name and add the relevant description, price, calories, allergens or ingredients. Select Upload for a new item image or Choose existing to reuse an image from the client’s assets.
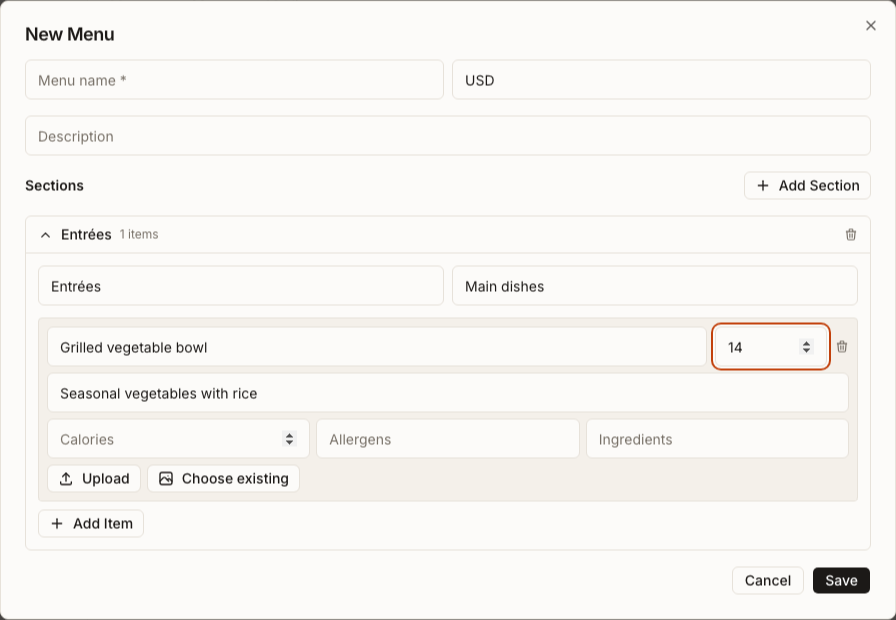
Add the remaining items and sections, then review the names, item details and currency. Select Save. Synup confirms Menu saved and adds the menu to the table.
Before assignment, make sure each intended branch is eligible. Open the location, select its Google tab, and check the Menus section. A food category normally marks the location automatically; This is a restaurant / food business must be selected for Menus-tab assignment.
Return to the client Menus tab, open the menu’s actions, and select Assign to Locations. Search by location name or city, select the intended restaurant branches, and select Save. The selected list becomes the menu’s complete assignment set, so clearing a previously selected branch removes its assignment.
Use Edit to update the saved menu. Use Clone when you need a separate starting copy; Synup copies its sections, items and photo references but not its location assignments. Assign the copy deliberately after reviewing it.
What you'll see when it's done
- The save confirmation reads Menu saved.
- The Menus table shows the menu name, section count, item count, creation date and assigned-location count.
- A successful assignment closes the dialog, confirms Assignments saved, and updates the row’s location count.
- A clone appears as a new row with (Copy) added to its name and zero assigned locations.
Watch out for
Questions people ask
What should I check before I begin?
Confirm the client, menu currency and intended branch list. Make sure each branch is marked as a restaurant or food business before you expect it in Assign to Locations.
How will I know the workflow is complete?
The menu appears in the table with the expected section and item counts. After assignment, its Locations count matches the restaurant branches selected in the assignment dialog.
Does cloning copy the assigned locations?
No. A clone copies the menu body and photo references, but assignments are intentionally left empty. Review and assign the copy separately.
Why is a location missing from the assignment list?
The location must belong to the menu’s client, be active, and be marked as a restaurant or food business. Open that location’s Google tab and review its category and Menus section.
Next
Use search and filters to find the intended branch before changing its restaurant status or Google menu. If an item needs a reusable image, manage the client’s media library.