
Add a client
How do I add a client?
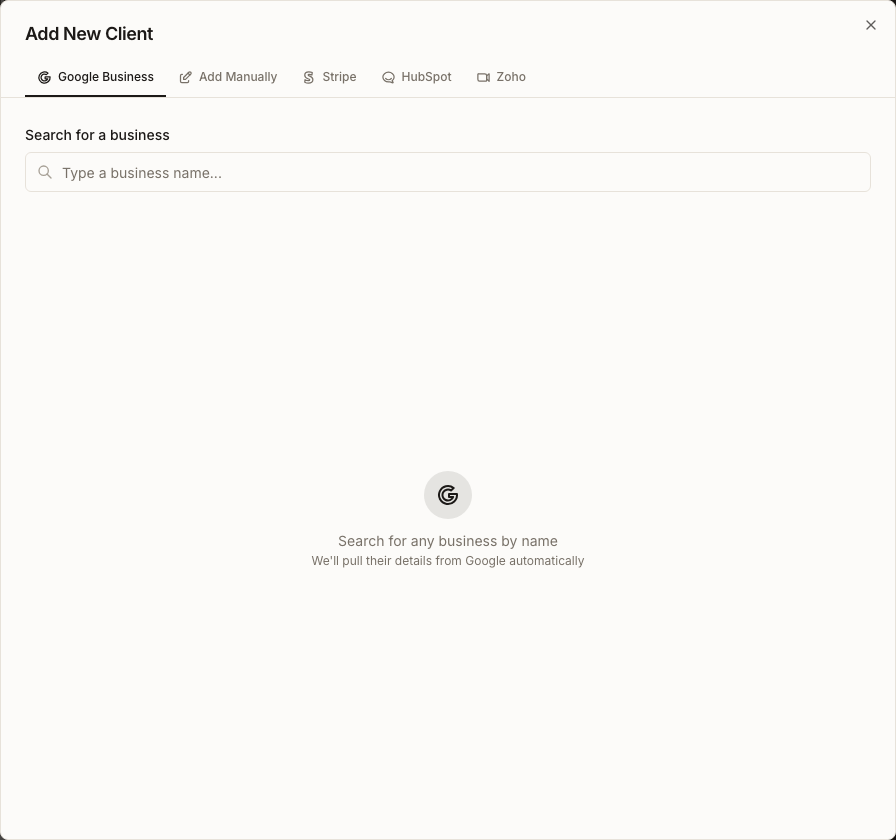
Open Clients and select Add Client. Search for the business on the Google Business tab when it has a Google Business Profile; that route fills its known details and also creates its first location. Use Add Manually when you only need the client workspace now and will add locations separately.
Key facts
| Where it lives | Clients → Add Client |
| Required information | A Business Name and Primary Representative |
| What the Google route adds | The client and, when capacity allows, its first location from the selected Google business |
| What the manual route adds | The client only; add its location afterward |
| What it changes | Creates a new client workspace. Add more creates the current client and resets the form for another |
Why this matters
A client is the container that keeps one customer's locations, marketing work, reporting and portal access together. Choosing the right creation route prevents two common setup problems: a manual client with no location to work on, or a Google business added twice as both a client and a separate first location.
Add a client from Google
- Open Clients from the main navigation.
- Select Add Client. The dialog opens on Google Business.
- Enter the business name in Search for a business. Use the address and category in the result to make sure it is the correct business, then select the result and choose Continue.
- Review the filled business name, website, industry and Google Business Profile. Choose the Primary Representative who owns the relationship.
- If an email is available, confirm it carefully. The email becomes the client's portal sign-in identity after it is saved and cannot be changed later.
- Owners can choose Public for team-wide access or Private and select the teammates who may open the client.
- Expand Advanced (optional) only when you need a tracking keyword or client custom-field values. Keyword tracking requires the Google Business Profile.
- Read any location-capacity notice. Adding from Google creates the first location in the same action. If the account is at its hard limit, the button changes to explain that the client will be added without a location.
- Select Add client. Do not add the same Google business again through an add-location flow when the first location was created successfully.
Add a client manually
Use this route when the business has no suitable Google match or when you deliberately want to create the client before its first location.
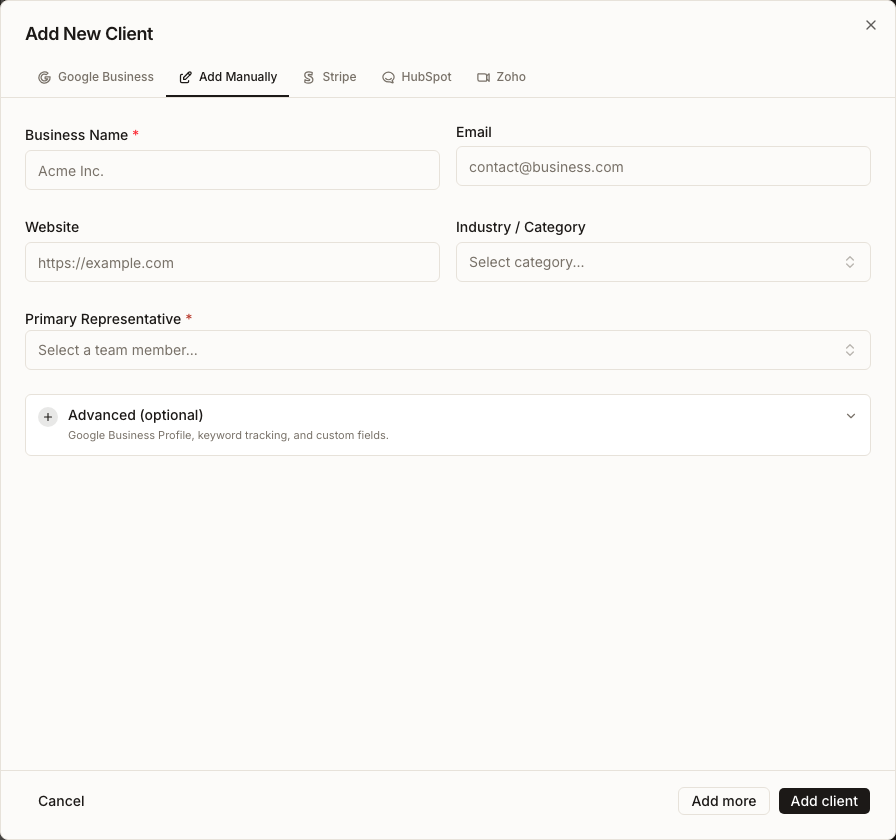
- In Add New Client, select Add Manually.
- Enter Business Name and choose a Primary Representative. The representative normally defaults to you.
- Add an email, website and industry when known. Email is optional at creation; a website you enter must be a valid web address.
- Set visibility if you are an Owner, and use Advanced (optional) for a Google Business Profile, tracking keyword or custom fields.
- Select Add client to create this client and open its detail page. Select Add more instead to create it and clear the form for the next client.
- Add a location afterward. A manual client does not receive one automatically.
What you'll see when it's done
- The new client is available in the Clients list.
- Add client opens the new client's detail page; Add more leaves the dialog ready for another entry.
- A Google-based add can include its first location. A manual add starts with no location.
- If location capacity prevented the first location, Synup reports that outcome instead of silently claiming the location was added.
Watch out for
Questions people ask
Is the email required?
No. You can create a client without an email and add one later. Once an email is saved, it becomes the portal login identity and cannot be edited, so verify it before saving.
Why did the client appear without a location?
Manual creation always adds only the client. A Google-based add can also omit the location when the account has reached its location limit or the location step cannot finish. Open the client and add the location only after confirming one was not already created.
Should I use Google Business or Add Manually?
Use Google Business for an established business whose correct profile you can identify; it carries more verified business detail and combines the first-location step. Use Add Manually when there is no reliable match or you need to establish ownership and access before location setup.
Next
To find the client again, see searching and saving client views. To interpret the new workspace, see understanding client health. For client-specific metadata and branding, see configuring a client workspace.