
Configure a client workspace
How do I configure custom fields and white label for a client?
Open Clients, select a client, then use Custom fields for client-specific operational data or White Label for that client's portal branding. Custom-field values save as you change them. White-label edits stay in the preview until you select Save changes. The current client page does not expose Package or Integrations tabs.

Key facts
| Where it lives | Clients → select a client |
| Current configuration tabs | Custom fields and, for eligible accounts, White Label |
| Custom-field save behavior | Each value is persisted when changed; there is no page-level Save button |
| White-label save behavior | Preview first, then select Save changes to create a client-specific override |
| Not currently available here | Package and Integrations tabs |
Why this matters
Agency defaults are useful until one client needs different operational context or customer-facing branding. Keeping those exceptions on the client prevents a one-off requirement from changing every workspace, while the reset path makes the branding exception reversible.
Set client custom fields
- Open Clients and select the client.
- Select Custom fields.
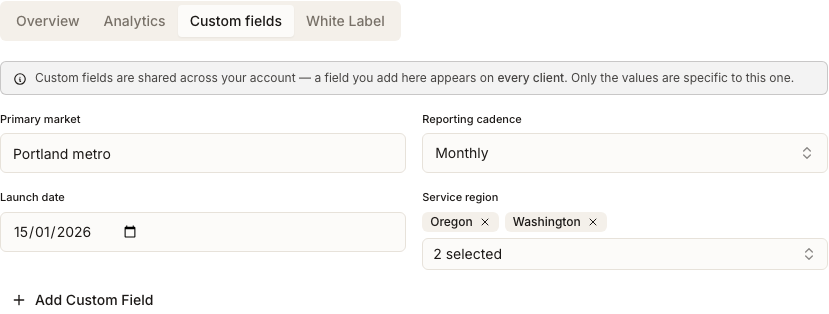
- Enter or change values for the agency's client-level field definitions. Each edit saves to this client as it is made.
- To create a definition, select Add Custom Field, choose its name and type, and confirm it. A new client-level definition can appear for other clients too; it is not only a private label for the current row.
- Recheck the displayed value after saving. If a write fails, Synup reports the error and reloads the stored values instead of leaving an unsaved value on screen.
Override the client portal brand
- Select White Label. This tab appears only when the account is eligible for the client app; it is hidden during a free trial.
- Review the current logo, favicon and color. Until an override is saved, the client inherits the account default from Settings → Client app.
- Change the assets or color and inspect the live portal-shell preview.
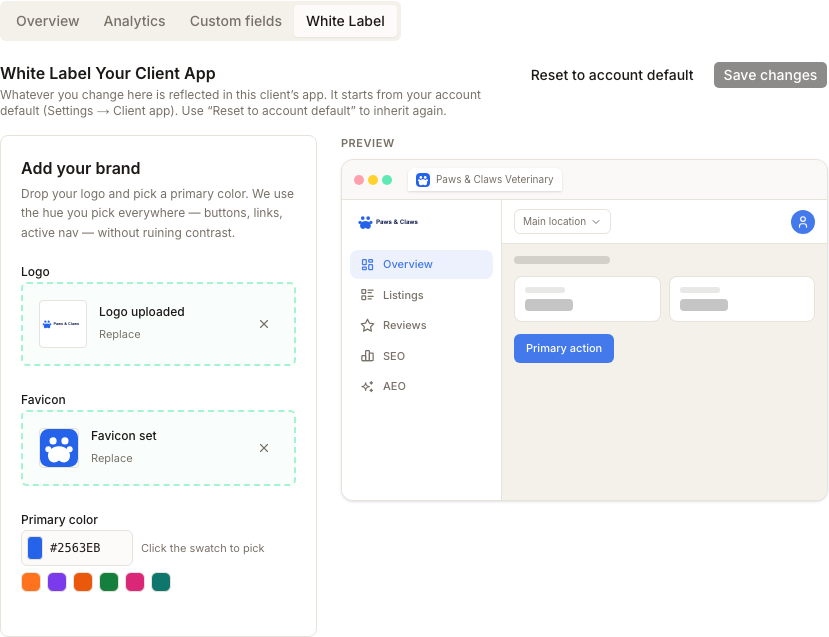
- Select Save changes. The button remains disabled until the editor differs from its loaded baseline.
- To return to account-wide branding, select Reset to account default. This clears the client's override so future changes to the account default can flow through again.
What about package and integrations?
The client detail page does not currently include Package or Integrations tabs. Those settings cannot be changed here. If you need to make one of those changes, use the relevant account or connection settings available to your account.
What you'll see when it's done
- Client-specific custom-field values on the Custom fields tab
- A portal preview reflecting unsaved branding edits
- Saved client branding that no longer inherits later account-default changes
- Inherited account branding again after Reset to account default
Watch out for
Questions people ask
Why don't I see White Label?
The tab is hidden when the account is on a free trial. It can also depend on client-app eligibility. Do not interpret an absent tab as a loading error when the rest of the client page is available.
When does a custom-field value save?
As soon as you change the value. Writes are queued in order, and a failed save reloads the stored data. There is no separate Save button for the tab.
Will changing the account default overwrite this client?
Not after you save a client-specific white-label override. Select Reset to account default when you want the client to inherit the account-wide brand again.
Where do I change the client's package or integrations?
They are not available on the client detail page. Use the relevant account or integration settings for those changes; the client workspace page contains only the tabs described above.
Next
To update the client's core identity, representative or visibility, use the row's Edit action from the Clients workspace. To interpret the summary cards before changing anything, see understanding client health.